
October 5, 2021
FREE PIN DESIGN, SHIPPING & GUARANTEE
FREE PIN DESIGN, SHIPPING & GUARANTEE
Enamel pins are stamped on metal or plastic and then painted over, while button pins usually consist of an image coated in a plastic layer, backed by metal.
The creation process sets these two kinds of pins apart. The fasteners are also different as buttons usually have safety-pin-like catches, and enamel pins look more like earring backs. They are both designed to be worn on clothing.
What is the difference between an enamel pin and a button pin? The primary differences are the appearance, materials used, and mechanism for keeping it in place. They also have different uses as enamel is usually seen as sturdier and is used for things like military badges, while button pins are more temporary as they do not hold up as well over time.
For anyone new to collecting or trading them, there are multiple distinctions between button pins and enamel pins that go beyond the appearance and materials used. The uses for each are unique, and so are the pros and cons of choosing one over the other. This article is going to briefly highlight the most significant differences.
These pins are usually made out of two main elements, and those are plated metal of your choice and enamel paint. They are smaller than button pins with general sizes ranging from .5 to 2 inches. Certain parts of the creation process and materials used will determine how the pin appears (e.g., smooth, matte, dimpled, etc.).
The closure mechanism on the back of the pin can come in a number of looks, and either has one or multiple pin-backs depending on the designer’s size and preference. These are more expensive to produce than button pins, and as such, are mostly used for business, military uses, or as a fashion statement piece.
There are two main kinds of enamel pins that you can tell apart based on appearance. Hard enamel pins have paint that is level with the surface of the die-cut, which means that the pin is smooth and flat, while soft enamel pins have thinner paint, which causes a dimpling effect between lines of the design. The variation of texture and look is one consideration, but soft enamel is also quite a bit less expensive while allowing for greater color control, which makes it a bit more popular with new artists.
Images are die-cut into the metal that you choose (e.g., steel, aluminum, copper, brass, or iron), and then the recesses of the design are usually filled with enamel paint. This makes for a beautiful, colorful accessory that can be used for any number of things.
This is the preferred type of pin for military and professional badges because they look sleek and are longer lasting than button pins. Their backing is also more secure while the materials used to make them overall more likely to weather continued use and rough treatment. Below are some popular uses for enamel pins.
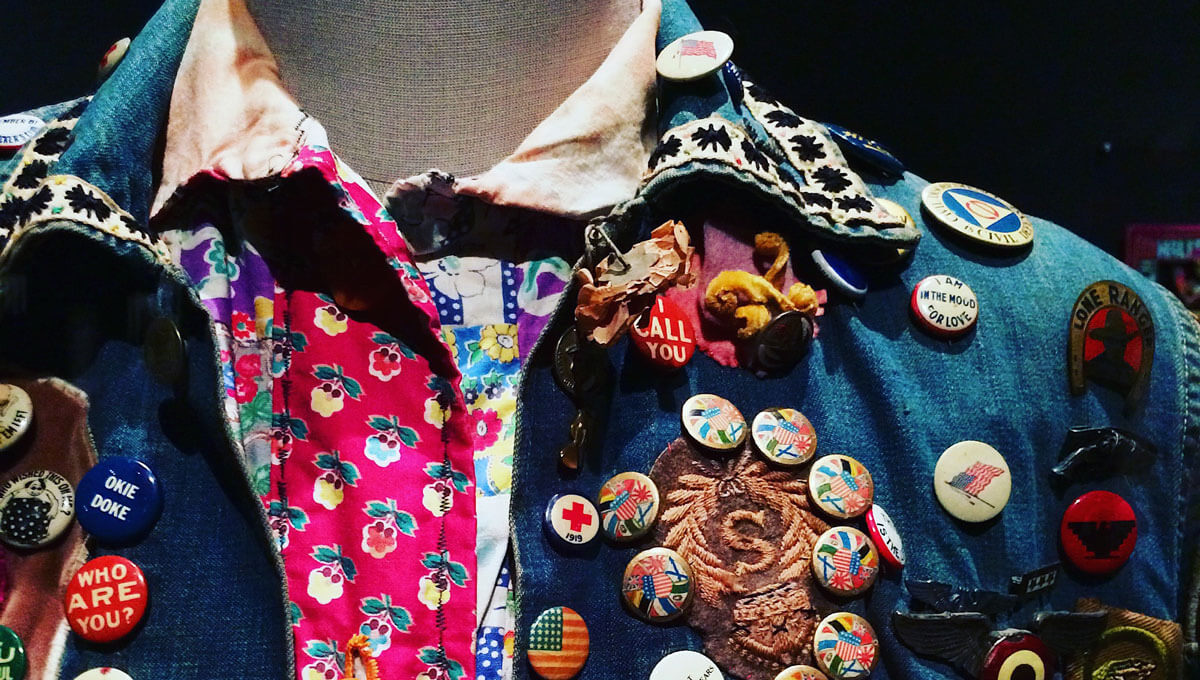
There are multiple names for these pins (e.g., pin button, pinback button, button badge), but they are all the same. They consist of a usually round button with a hard metal or plastic backing that features a pin or latch mechanism for affixing it to clothing. The image on the front is protected under a thin layer of plastic to keep it waterproof and scratch-resistant.
Most button pins are for temporary identification or appearance, but they are a collector item. Depending on how well they are cared for, these pins can last just as long as enamel pins though they are much easier to damage and tend not to stay latched. Many people use buttons as a way of expressing their opinions, interests, and fashion style.
Buttons are made using pictures printed out on paper, plastic to cover the image, and metal to hold everything together. The latching mechanism is built into the metal backing or easily attached, depending on the style chosen. These are cost-effective materials and are usually not meant to last for very long.
There are a few ways to make a button pin. You can buy snap-on button casings, which are one of the easiest methods. To use them, you simply follow these steps.
For more professional-looking pins, you can use a pin press. This machine makes it easy to pump out hundreds of buttons in a short amount of time. There are cheaper hand presses, but for the best results, most manufacturers use a table press and the following steps.
Due to their more fragile nature, these pins are mostly used for decoration or temporary identification. They are much cheaper and faster to produce when compared to enamel pins, which makes them ideal for things like fundraisers, conventions, and other quick events. Below are a few popular uses of button pins.


Address For Mailing:
3556 S 5600 W #1-685 Salt Lake City, UT 84120
